How to Check If a GPU Is Working Properly



Graphics cards are one of the pricier items, and the same goes for the contribution toward a higher price tag for laptops. In certain situations, we need to know how to check if a GPU is working properly.
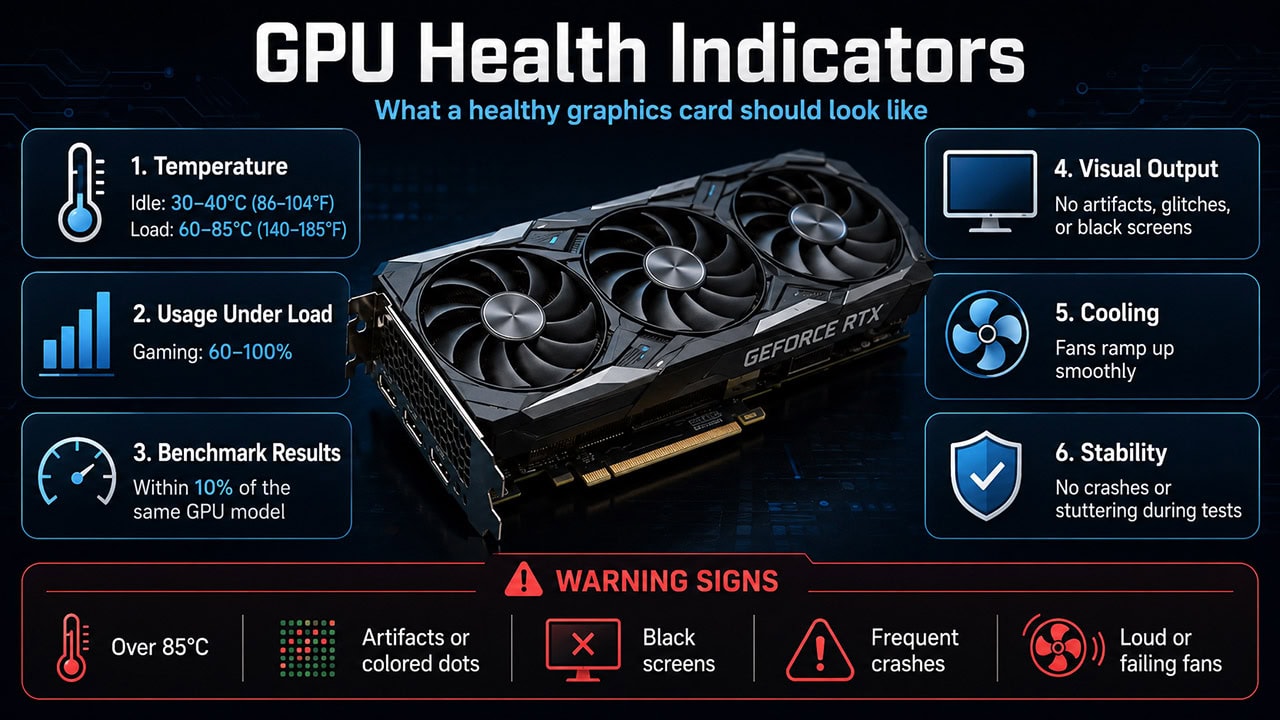
A faulty GPU can cause game crashes, show strange visual artifacts, or could be running too hot. Spotting the signs early lets you rule out a simple fix before you assume the card is dead. A working card sits at 140-185°F (60-85°C) while gaming, runs benchmarks without stuttering, and renders everything clean.
You can check your graphics card health using Windows Task Manager to see GPU usage. Use MSI Afterburner or HWMonitor to watch temperatures. Run stress tests like 3DMark to check for problems. A card that's working properly will show steady temps, no visual glitches, and benchmark scores within 10% of what other cards like yours get.
The most common GPU failure is no POST (Power-On Self-Test), which means your computer turns on but shows nothing on screen. Heat problems are trickier to spot. The system starts up fine, but once the GPU gets hot, you might see visual glitches, crashes, or a blank screen.
1. Quick GPU Health Checks First
Before running detailed tests, start with the basics. Make sure your GPU's power cables are pushed in all the way, as loose cables are a very common cause of crashes and blank screens. If you're having display problems, try a different video cable or port before deciding the card itself is broken.
It's also worth checking for driver updates on NVIDIA, AMD, or Intel's website, since old drivers cause problems that look like the hardware is broken.
You can also open Device Manager (right-click Start, select Device Manager) and expand Display adapters to confirm Windows sees your GPU; a yellow warning icon or a missing entry there points to a driver or connection problem before you go any further. To start, expect 86-104°F (30-40°C) at idle and 140-185°F (60-85°C) while gaming.
Warning: If your GPU temperature goes above 185°F (85°C) often, it may be slowing itself down to cool off, or it could be at risk of damage. Fix cooling problems right away.
2. Using System Monitoring Tools
Built-in Windows tools can quickly show if your computer sees your GPU and if it's working right.
Windows Task Manager GPU Monitoring
Press Ctrl + Shift + Esc to open Task Manager, then click the Performance tab and look for the GPU section. When idle, usage should be close to zero (0-5%) and video memory below 500MB. Under gaming load, you should see 60-100% usage, which means the card is fully engaged and working as expected.
Warning: If GPU usage shows 0% during games, your card may not be detected. If idle usage is above 30%, something running in the background may be using your GPU.
GPUs work much harder and run hotter than CPUs. While your CPU might have 8-16 cores, today's GPU has thousands of smaller cores all running at once. This creates a lot of heat packed into a small space. GPUs also have more parts that can break, including VRAM chips that can overheat, power systems that handle 200-450 watts, and cooling fans that can wear out. The biggest problem is heat cycling. Your GPU goes from 104°F (40°C) when idle up to 176°F (80°C) or more while gaming, many times each day. This constant heating and cooling puts stress on solder joints, thermal paste, and circuit board connections. GPUs are also pushed harder than CPUs, whether from overclocking, mining, or long gaming sessions, while most CPUs only run at 30-50% of their power.
Detailed GPU Monitoring Tool Setup
These free programs let you watch your GPU's health in detail. Here's how to use each one:
MSI Afterburner (Recommended for All Graphics Cards)
- Download and Install: Go to MSI's website and download the latest version of Afterburner. It comes with RivaTuner, which shows stats on your screen while gaming.
- Initial Setup: Open MSI Afterburner and click the gear icon to open settings.
- Enable GPU Monitoring: Click the Monitoring tab and check the boxes for GPU temperature, GPU usage, video memory usage, clock speed, and fan speed.
- On-Screen Display: Turn on "Show in On-Screen Display" for the stats you want to see while gaming.
- Key Numbers to Watch:
- GPU Usage: Should reach 95-100% during heavy gaming
- Clock Speed: Should match what your card is rated for
- Fan Speed: Should go up when the GPU gets hotter
- Power Draw: Steady power use means your GPU is working well
GPU-Z (Detailed Graphics Card Information Tool)
- Download GPU-Z: Get it free from TechPowerUp's website.
- Graphics Card Tab: Make sure all the specs match what your GPU should have.
- Sensors Tab: Watch your GPU stats in real time:
- GPU Load shows how hard your card is working
- Memory Controller Load shows how busy the video memory is
- PerfCap Reason shows what is limiting performance; 'Pwr' under heavy load is normal and means the card is hitting its power limit; 'Temp' means thermal throttling is active and needs attention
- GPU Validation: Use GPU-Z validation or compare the reported specs against TechPowerUp's GPU database to make sure your graphics card isn't fake.
HWiNFO64 (Complete System Monitoring)
- Installation: Download from HWiNFO.com and install the program.
- Sensors-Only Mode: Open HWiNFO and pick "Sensors-only" to see live stats.
- Find Your GPU: Look for your graphics card in the sensor list.
- Key Numbers to Track:
- Temperature Sensors (check the core, hotspot, and memory temps)
- Power Use (compare to what your card is rated for)
- Thermal Throttling (should say "No" during normal gaming)
- Memory Errors (should always be zero)
- Temperature Logging: Turn on logging to track temperature changes over time.
Temperature Patterns: Card temperature should climb gradually during gaming. If you see sudden temperature jumps or wild swings, that often means the cooling system has a problem. The thermal paste might be old, or the thermal pads on the memory chips might not be making good contact.
3. GPU Performance Testing and Benchmarking
Test your graphics card's performance and stability with these benchmark programs.
Recommended GPU Benchmarking Tools
3DMark is the most widely used benchmark for gaming performance and GPU stress testing. For free stability testing, Heaven and Valley from Unigine are solid choices; run them for at least 30 minutes to bring out heat problems. PassMark lets you compare your card's score against a large database of results for the same GPU model. FurMark is the most intense stress test out there, but use it carefully, as it pushes power use hard and can expose PSU weaknesses.
Understanding Your Results
Your card should score within 10% of typical results for your model on 3DMark, and at or above the median score for your GPU on PassMark. Frame rates should be smooth with no stuttering, and you shouldn't see any visual glitches during the test. Temperature staying below 185°F (85°C) throughout a long run is the final sign everything is working as it should.
Warning Signs: Sudden frame rate drops, stuttering, the GPU not reaching its full speed under load, fans running at full speed when doing light tasks, or memory errors during stress tests all point to possible hardware problems.
4. Physical GPU Inspection and Maintenance
Many GPU problems come from physical issues that software can't find. Here's how to check your graphics card by hand, just like you would with the other parts of a computer.
Safety First: Turn off your computer completely and unplug it from the wall before opening the case or touching any parts inside. Touch a metal surface to get rid of static electricity first.
Checking the PCIe Slot and Connector
Unscrew the bracket, push the release latch on the PCIe slot, and carefully remove the card. Look at the gold edge connector for rust, color change, dust, bent pins, or any burn marks. If it looks dirty, clean it gently with 90%+ rubbing alcohol and a lint-free cloth or cotton swab. While the card is out, check the motherboard slot itself for dust buildup or pin damage. When you put the card back, push it firmly until you hear the latch click. This same once-over is worth running on any second-hand card, and on the whole system when you are buying a used computer.
GPU Power Connector Issues
For standard 8-pin or 6-pin connectors, make sure the cables are pushed in all the way with no gaps. If you have an RTX 40 or 50 series card using the 12VHPWR connector, push it in until it clicks firmly and avoid bending the cable within 1.4 inches (35mm) of the connector, as that connector has a known history of melting when stressed. Check for any color change or burnt smell around the connector. As a general rule, check your power supply headroom and keep at least 20% more wattage than your system draws under load.
GPU Sagging and Support
Important: Today's high-end graphics cards can weigh over 4.4 pounds (2kg). Without support, a sagging GPU puts uneven pressure on the PCIe slot. Over time, this can cause connection problems, slot damage, or tiny cracks in the circuit board.
Look at your GPU from the side; the far end should be level, not drooping. If it's sagging, install a support bracket or anti-sag stand. A vertical GPU mount with a riser cable is another option, and some people use cables tied from above to keep the card in position.
GPU Thermal Paste and Thermal Pad Inspection
This section is for advanced users who are okay with taking apart a graphics card. Note that removing the GPU cooler usually cancels the warranty, so only do this on older cards or ones already out of warranty.
Graphics cards older than 3-4 years often do better with fresh thermal paste on the GPU chip; the signs are temperatures slowly climbing over months or throttling that wasn't there before. Thermal pads on the VRAM and VRM chips also wear out over time. Picking the right thickness is critical (usually 0.5mm, 1mm, 1.5mm, or 2mm depending on the chip); measure the old pads or look up a teardown guide for your card. Using the wrong thickness means poor contact and overheating, no matter how good the pads are. For materials, Arctic MX-4 or Thermal Grizzly Kryonaut are good paste choices, and Gelid or Thermalright make quality pads.
GPU Cooling System Maintenance
Use compressed air to clean the heatsink fins and fan blades, holding each fan still while blowing so you don't spin the bearings too fast. Spin each fan by hand after and feel for any grinding or stiffness; a healthy fan should spin freely and quietly. If you hear clicking, grinding, or rattling while the fans are running, the bearings are worn. Also make sure your case has clear airflow paths reaching the GPU; a card with good thermal paste but poor case airflow will still run hot.
5. Common Problems and Solutions
Here are the most common graphics card issues and how to fix them.
No Display on Startup (Most Common Failure)
Symptoms: The computer turns on and fans spin, but nothing shows on screen. No BIOS, no Windows logo, just a black screen.
Start with the obvious: make sure the monitor is actually plugged into the GPU and not the motherboard's video output, and try a different display cable and port. Listen for beep codes from the motherboard, as those point to specific hardware problems. Check whether the GPU fans are spinning, which at least shows it's getting power.
If the basics check out, look at power. Loose power cables that aren't pushed in all the way are a common cause, as is a PSU that's not powerful enough for the card. Try swapping to different cables from the power supply. For connection issues, remove the GPU and push it back in firmly, clean the edge connector with rubbing alcohol (the same idea used to clean RAM contacts), and try a different PCIe slot if you have one. If your CPU has integrated graphics, remove the GPU entirely and connect the monitor to the motherboard; if it boots normally, the card itself is the problem.
Heat-Related Failures (Problems That Get Worse Over Time)
Symptoms: The system starts up fine but develops problems as the GPU heats up. You might see visual glitches, a black screen, or crashes after 10-30 minutes of use. It often works again after cooling down.
Heat-related failures are recognizable by their pattern: everything works fine at first, then problems appear after 10-30 minutes of gaming, and disappear again once the system cools down. Temperatures climbing above 185-194°F (85-90°C) and symptoms getting worse in a warm room are strong signs. The most common causes are dried thermal paste on GPUs over 3 years old, dust blocking the heatsink, worn cooling fans, wrong thermal pad thickness on the memory or VRM chips, and poor case airflow. Clean the heatsink first, then check fan operation. If temperatures are still high, consider replacing the thermal paste. Undervolting through MSI Afterburner can also lower heat a lot without making the card slower.
Visual Artifacts and Corruption
Artifacts show up as random colored dots or lines, checkerboard patterns, stretched triangles across the screen, or colors looking wrong. Overheating is the most common cause, so fix cooling first. If you're running an overclock, turn it down or shut it off entirely. Artifacts that keep showing up at stock settings with normal temperatures point to VRAM failure; run stress tests like OCCT with its VRAM test to confirm. Driver corruption can also cause artifact-like symptoms; use DDU (Display Driver Uninstaller) to do a clean removal, then install the latest version fresh. If artifacts continue after all of that, the card may be failing.
Random Problems (Hardest to Find)
Real Example: My Asus RTX 3090 would run perfectly for days, then randomly cause blank screens or restarts. The problems went away after cooling down, which made them very hard to diagnose without long stress tests.
Random issues are the hardest to find because they don't happen when you want them to. Run stress tests for 2-4 hours with temperature monitoring on the whole time to try to trigger the problem. After any crash, check Windows Event Viewer for GPU-related errors. Swap power cables to rule out a bad power rail, and if you have access to another PC, test the card there. The main cause is usually heat that only shows up under certain loads, bad solder joints reacting to the parts expanding and contracting from heat, shaky power delivery, VRAM errors when hot, or driver problems with certain games.
Performance Getting Worse
Screen flickering is almost always a driver issue; update to the latest version or roll back to a previous one that was stable. If your frame rates are lower than expected, check whether the GPU is throttling due to heat (most cards begin throttling at 87°C / 189°F or higher, though the exact point depends on the model) and confirm that GPU usage is actually hitting 95-100% during gaming. If usage is lower, your CPU may be the bottleneck rather than the GPU, and it is worth confirming the processor itself is working properly. A slow performance drop over time is usually dust buildup causing thermal throttling, and a deep cleaning usually fixes it.
Tip: A well-maintained graphics card can last for many years. Regular cleaning and monitoring will help you catch most problems before they get serious.
We put together a video version of this.
Related Posts
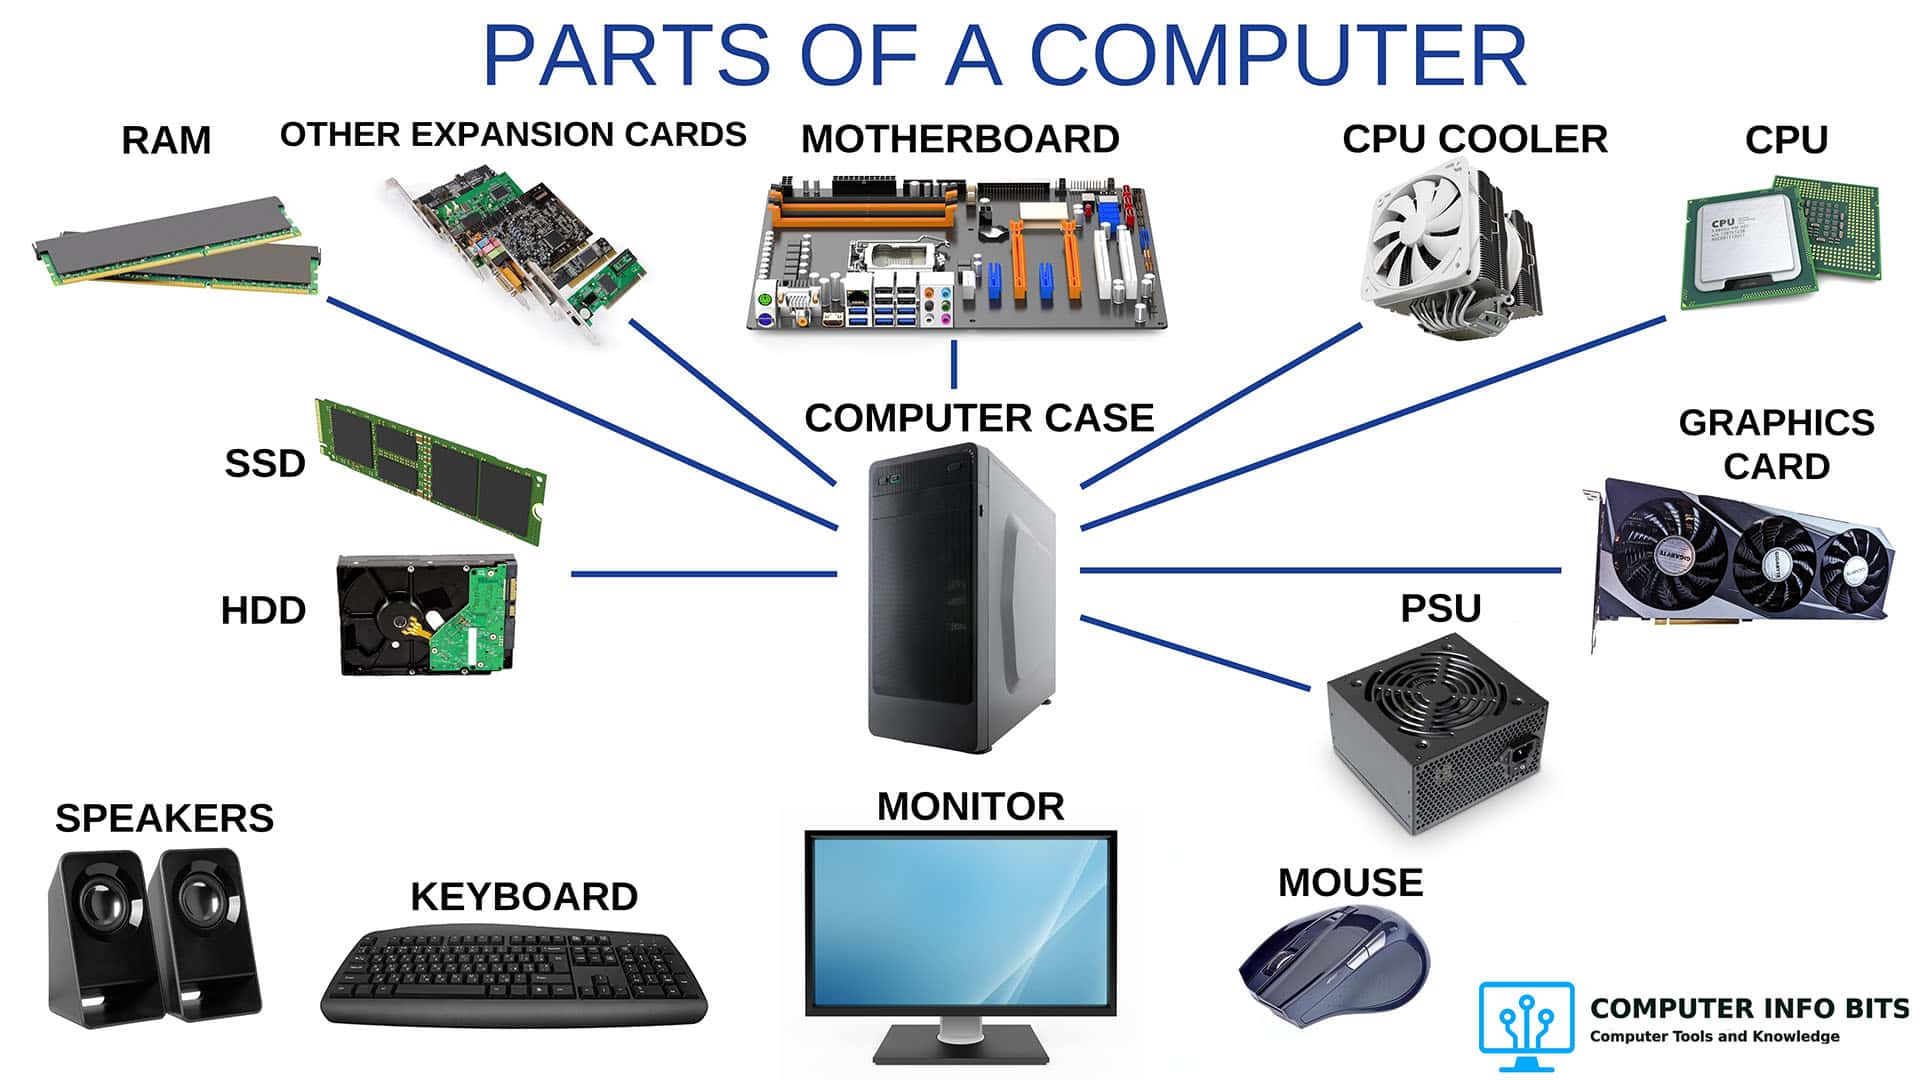
Parts of a Computer and Their Functions
A complete breakdown of every major PC component including the CPU, RAM, GPU, storage, PSU, cooling, and connectivity.
How to Know If Your CPU Is Thermal Throttling
Spot the signs of a CPU slowed by heat, confirm it with HWiNFO64, and learn the Intel and AMD limits that trigger it.
What FPS Do You Need for Gaming?
Once you know the card is healthy, the next question is whether it is hitting the right target. Working numbers per genre, plus a calculator.
What Is GPU Scalping?
How bots buy graphics cards at retail and resell them far above MSRP. Worth knowing before buying a used or resold card.
How Much Energy Do Gaming Computers Use?
The graphics card is the biggest power draw in the build. What a gaming PC costs to run per year, and the changes that bring the number down.