How to Replace GPU Thermal Paste
By Marlo Strydom · Last updated
Knowing how to replace GPU thermal paste is one of the most effective and cheapest ways to bring a graphics card's high temperatures back down. The factory paste between the GPU chip and its heatsink dries out over a few years, and once it does, heat stops moving across that joint properly. When I check a client's card that has started running hot, the paste is one of the first things I look at, and it is often the whole problem.
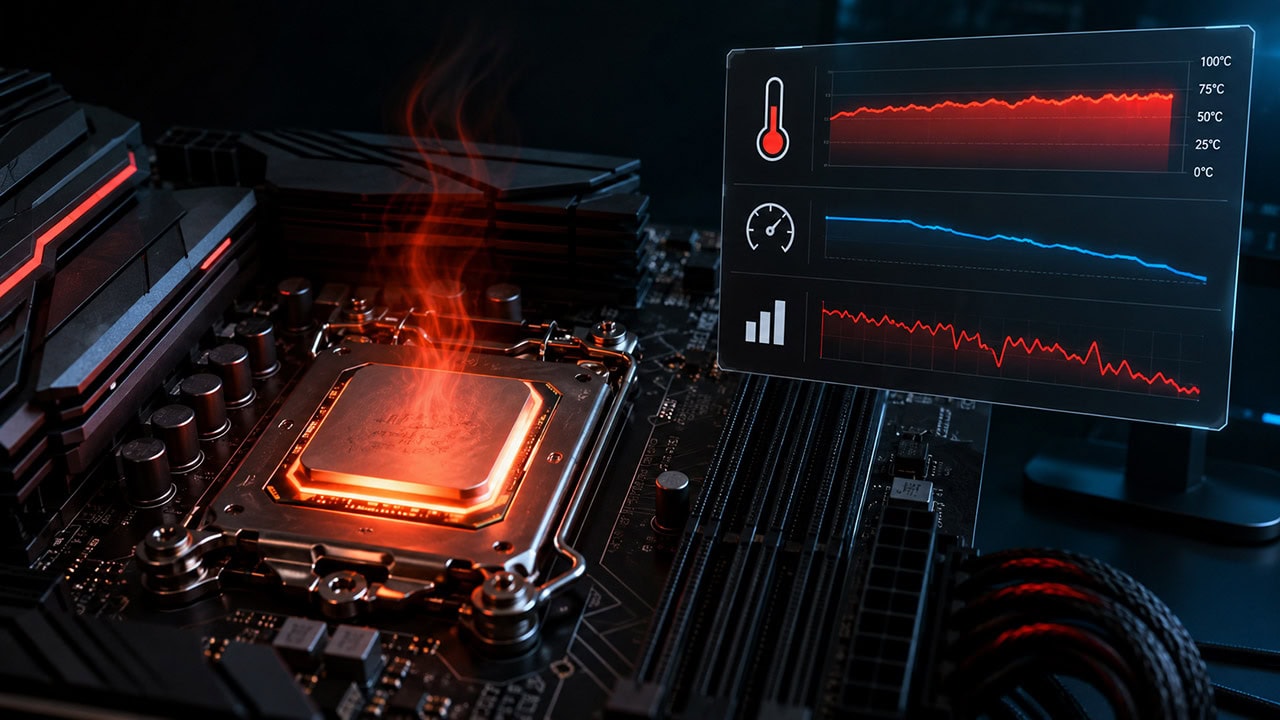
If your card is running hotter than it should, sitting above 185°F (85°C) while gaming, or slowing itself down through thermal throttling, dried-out paste is a likely cause. The job takes about 45 minutes, costs under $10 in materials, and typically drops temperatures by 18-36°F (10-20°C) on cards more than two years old.
Warranty alert: taking the cooler off almost always voids the manufacturer warranty from ASUS, MSI, Gigabyte, and others. Only do this on a card that is already out of warranty (usually 2-3 years old) or one where you accept the risk. If the card is newer and overheating, claim the warranty instead.
What You Need
Do not overthink the shopping list. This is what actually matters:
- Thermal paste: a quality non-conductive compound such as Noctua NT-H2, Arctic MX-4, or Thermal Grizzly Kryonaut. One small tube is plenty.
- Thermal paste remover: a dedicated remover like ArctiClean softens and lifts the old compound properly, which is exactly what you want on a delicate GPU die.
- Cotton swabs and a lint-free cloth: a microfiber cloth or coffee filter. Avoid paper towels, which shed fibers that ruin heat transfer.
- Phillips screwdrivers: usually #1 and #2 sizes for the various screws.
- Compressed air: to blow dust out of the fins and fans while everything is apart.
- A small container or magnetic tray: the screws are tiny and easy to lose, and some cards mix screw lengths.
- An anti-static wrist strap: cheap insurance against a static shock killing the memory chips.
It is not that the paste is cheap, exactly; it is chosen for the wrong priorities for a long-term owner. Factory compound has to survive months in a warehouse across a range of temperatures without drying out, and it has to be applied by a machine that cannot feel how much to use. The high-performance pastes enthusiasts love tend to dry out faster and cost many times more, so spreading them across every card made would cost a fortune for a benefit that mostly shows up after the warranty has expired. Manufacturers know the paste will fade over 2-3 years regardless, so they optimize for shelf life and consistency rather than peak performance. That gap is exactly why replacing it on an older card gives such a noticeable temperature drop.
1. Remove the Card Safely
No shortcuts here. Rushing this step is how people fry expensive hardware.
- Shut Windows down fully, switch off the power supply at the back of the PC, and unplug it from the wall.
- Unplug the PCIe power cables from the card (the 6-pin, 8-pin, or 12-pin connectors).
- Remove the bracket screws holding the card to the case, then push the retention tab on the PCIe slot and lift the card straight up.
- Work on a clean, hard surface and clip your anti-static strap to bare metal on the case.
While the card is out, give the fins and fans a blast of compressed air. Dust buildup makes cooling worse on its own, and it is far easier to clear now. For more on how the card fits into the wider system, see the parts of a computer and what each one does.
2. Take the Cooler Apart
Every card is laid out a little differently, but the order is much the same across brands. Take photos with your phone at every stage. You will thank yourself during reassembly.
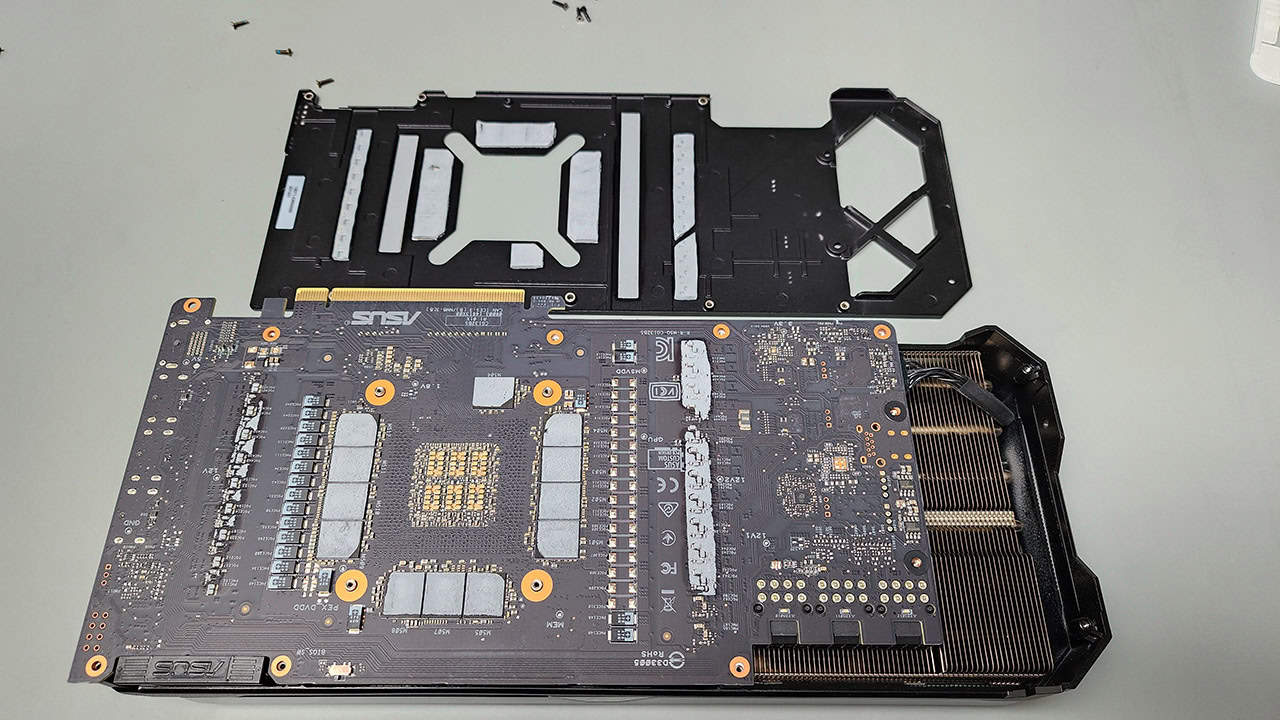
- Remove the backplate screws (usually 4-8 small Phillips screws around the edges).
- Disconnect the fan header cables, wiggling the connectors gently rather than pulling the wires.
- Find the spring-loaded heatsink screws around the GPU die, usually 4-6 of them.
- Loosen them a little at a time in an X pattern to release pressure evenly and protect the die.
- Note where each screw came from, since some cards use different lengths in different spots.
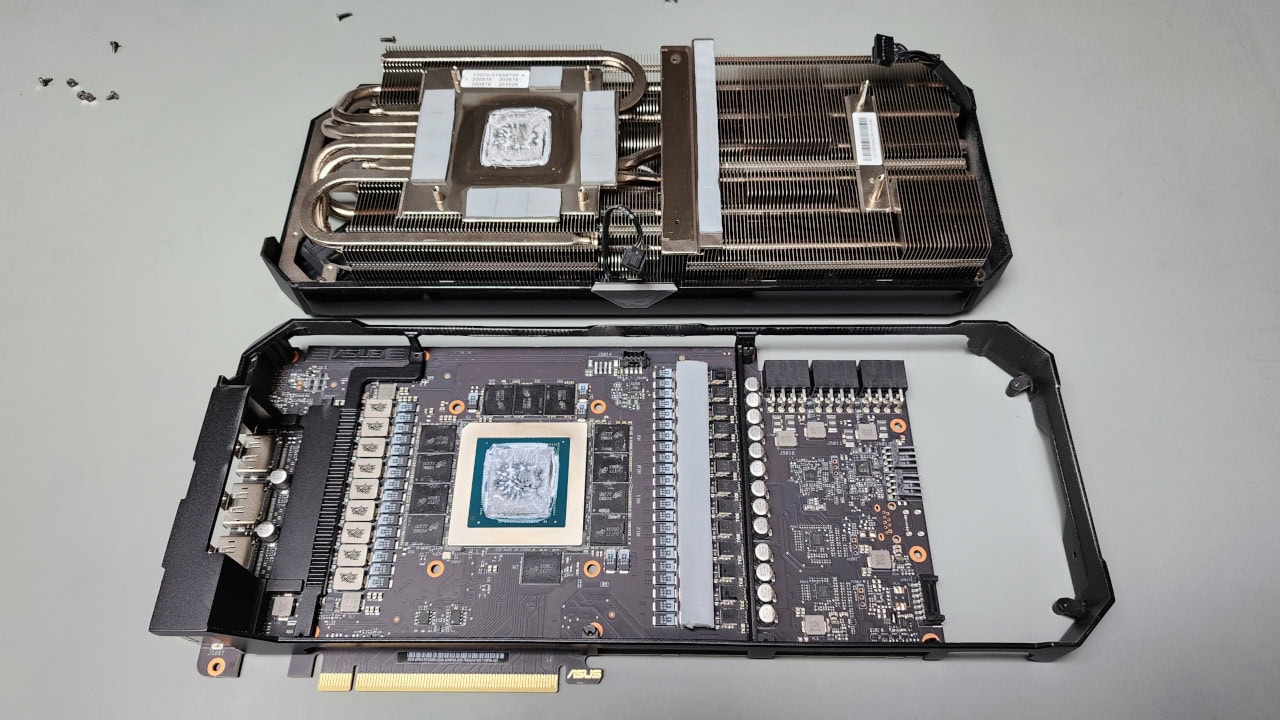
The heatsink may be stuck to the die by old paste acting like glue. Do not force it. A gentle twisting motion breaks the seal far more safely than yanking, which can chip the GPU die or crack the board.

Leave the thermal pads alone: the soft gray or pink squares on the VRAM and VRM chips are doing their own cooling job. Replace them only if one is torn or damaged, and match the original thickness exactly if you do. For everything else, just the paste on the main die changes.
3. Clean Off the Old Paste
This step decides whether the whole job works. Leftover residue creates tiny air gaps that block heat from crossing between the die and the heatsink.
- Apply your cleaner to both the GPU die and the heatsink's contact surface.
- Give it a minute to soften the old compound, then wipe with cotton swabs in small circles.
- Finish with a lint-free cloth until both surfaces are clean, dry, and streak-free.
- Check the edges of the die for paste that squeezed out and dried there.
Both metal surfaces should end up clean and even, with no smears or fingerprints. Skin oils alone can create a hot spot, so try not to touch the cleaned die. It calls for the same careful, patient approach as cleaning RAM contacts, just with different materials on a more delicate surface.
4. Apply the New Paste
This is where most people go wrong by using far too much. A rice-grain amount in the center of the die is right for most cards; a large die like an RTX 4090 or RX 7900 XTX can take a slightly bigger pea-sized dot. The mounting pressure spreads it into a thin, even layer as you tighten the heatsink back down.
Do not spread it by hand. Let the heatsink pressure do the spreading when you screw it down in an X pattern. Smearing paste on manually with a card traps air bubbles and gives uneven coverage, which is worse than a single central dot. Apply paste only to the die, never to the heatsink or the surrounding chips.
5. Reassemble and Test
Assembly is disassembly in reverse, with one thing to get right: even pressure on the die.
- Lower the heatsink straight down onto the die. No sliding, or you will smear the paste.
- Start every spring-loaded screw by hand before tightening any of them.
- Tighten in an X pattern in small quarter-turns so pressure builds evenly.
- Firm but not forced; overtightening can crack the die. The spring screws should reach a natural stop.
- Reconnect the fan headers, refit the backplate and shroud, and double-check every screw and cable.
Reinstall the card, reconnect the PCIe power, boot into Windows, and watch the temperatures with a tool like HWiNFO64 or GPU-Z. Confirming the result is just the monitoring half of checking the GPU is working properly.
- Idle on the desktop should sit around 86-104°F (30-40°C), depending on room temperature.
- Gaming should stay under roughly 167°F (75°C) on most cards.
- Run a stress test such as Unigine Heaven or 3DMark for 15-20 minutes and watch the temperature settle rather than climb.
- The hotspot or junction temperature should be only 18-27°F (10-15°C) above the edge temperature; a much larger gap means uneven contact.
If temperatures are no better, or worse, the heatsink probably is not making full contact. That usually means too little paste or uneven pressure. It happens to experienced builders too, so do not be discouraged: take it apart, reclean, and reseat.
What to Expect Afterward
Fresh paste typically drops temperatures by 18-36°F (10-20°C) on a card more than two years old. The fans then spin slower to hold the same temperature, so the whole system runs quieter, and a cooler card under less fan load also nudges down how much energy the PC uses. Best of all, you may have bought a hot, throttling card several more years of life instead of replacing it.
One last tip: paste alone cannot fix a card that is starved of fresh air. If temperatures were high because the case itself runs hot, pair this with good case airflow so the heatsink has cool air to work with.
Related Posts

How to Check If a GPU Is Working Properly
Confirm whether heat is the real issue before you take anything apart: monitoring tools, benchmarking, and common GPU faults.
How to Know If Your CPU Is Thermal Throttling
The same heat problem on the processor side. Spot it, confirm it with HWiNFO64, and learn the limits that trigger it.

PC Airflow Optimization: How to Cool Your Computer
Fresh paste needs cool air to work with. Set up your case fans so the heatsink is not fighting a hot case.
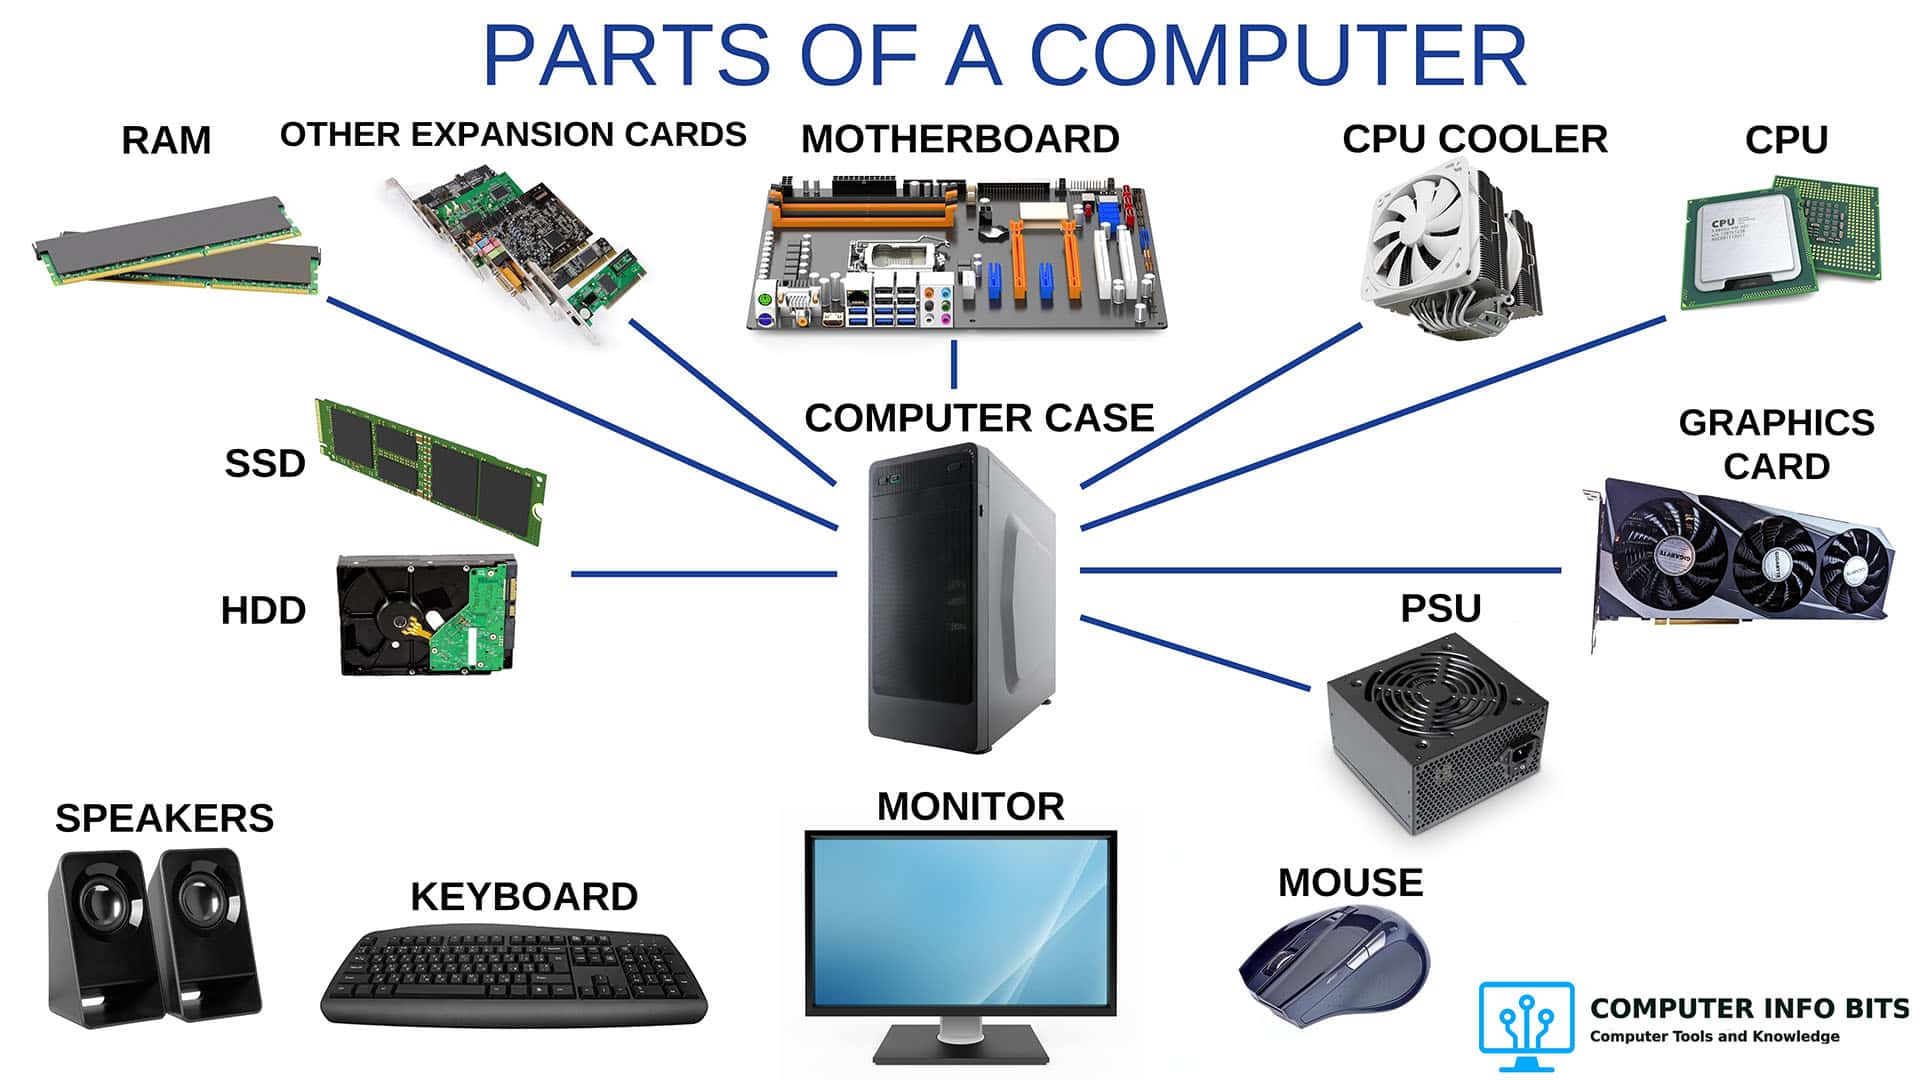
Parts of a Computer and Their Functions
A plain-language breakdown of every major PC component, including the GPU and the cooling system.