How to Check If a CPU Is Working Properly
By Marlo Strydom · Last updated
The processor is the one part that everything else depends on, so when a computer crashes, freezes, or refuses to start, the CPU is often the first suspect. The good news is that you do not need special training or expensive tools to check it. Most of the work happens in software you can download for free in a few minutes.
A faulty CPU can cause random restarts, blue screens, or a machine that powers on but shows nothing on screen. The tricky part is that those same symptoms are far more often caused by RAM, the power supply, drivers, or heat. This guide walks through the checks in order, from the fastest to the most involved, so you can rule out the easy causes before you blame the chip.
To check if your CPU is working, confirm the computer boots and the BIOS reports the right speed and core count, then open Task Manager (Ctrl + Shift + Esc) and watch CPU usage settle low at idle and rise under load. Use Core Temp or HWiNFO to confirm temperatures stay under 185°F (85°C), then run a stress test like Prime95 for 30 minutes. A healthy CPU passes with no errors, no crashes, and steady clock speeds.
Keep one thing in mind before you start: genuine CPU hardware failure is rare. In practice, only around 10 to 20 percent of suspected CPU problems turn out to be the processor itself. The rest are heat, memory, power, or software. That is why the order of these checks matters.
1. Quick CPU Health Checks First
Before installing anything, start with what the machine is already telling you. Does it power on at all? Do the case and CPU fans spin up? Does it reach the maker's logo or the Windows login screen? A computer that boots into Windows and runs for a while already has a CPU that is mostly working; the question then becomes whether it is fully stable, not whether it is dead.
If the machine will not start, the CPU is only one of several possible causes, and usually not the most likely one. Reseat the RAM, confirm the power cables to the motherboard and CPU are pushed in fully, and clear any beep codes (covered below) before assuming the processor has failed. Many "dead CPU" cases are actually a loose stick of memory or a power connector that was never clicked into place.
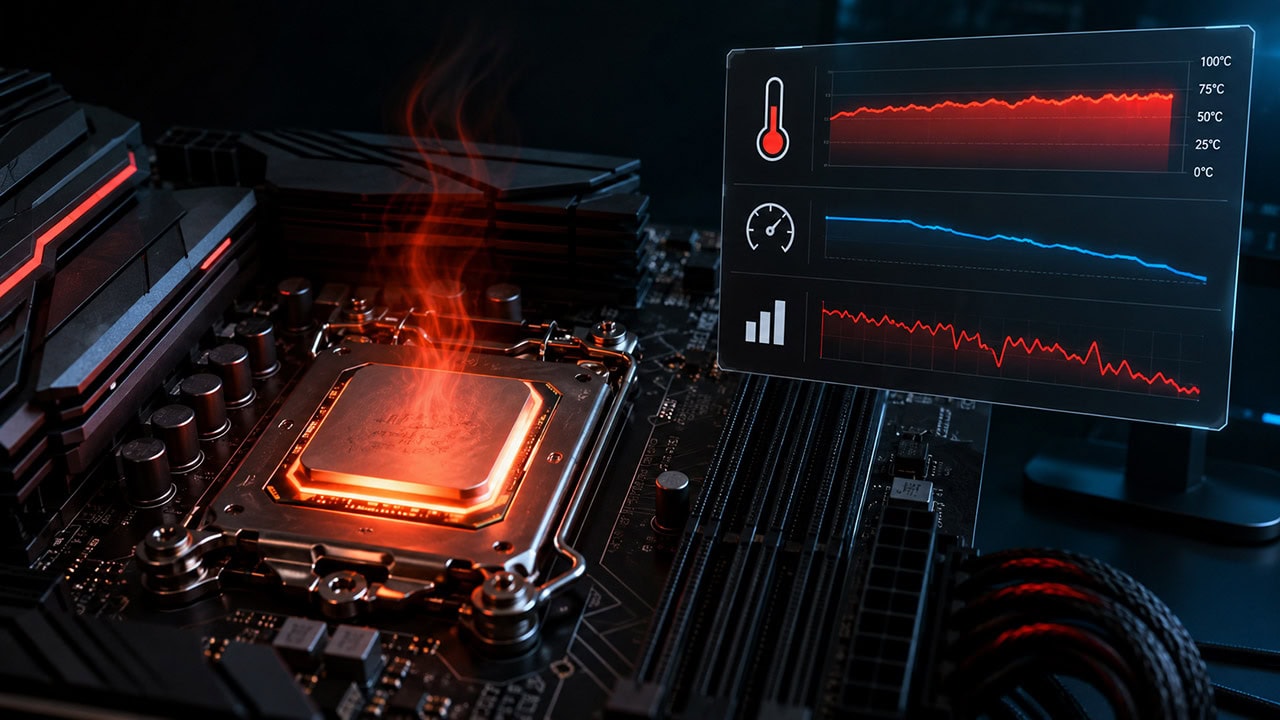
Warning: If your CPU temperature regularly climbs above 194°F (90°C), the chip is either slowing itself down to survive or is at risk of damage. Sort out cooling before running any long tests.
2. Boot and Startup Checks
Before Windows loads, the motherboard runs a quick hardware check called POST (Power-On Self-Test). This is your earliest and clearest signal about the processor's health.
Listen for Beep Codes
If something core fails POST, most motherboards beep in a pattern through the internal speaker or a header. The exact meaning depends on your board's BIOS, so always confirm against your motherboard manual, but these are common patterns that point toward the CPU.
Common CPU-Related Beep Patterns
- 1 long + 2 short: CPU not detected or failed its startup check
- 1 long + 3 short: CPU power or compatibility problem
- Continuous short beeps: the CPU is already too hot at startup
- No beeps and no display: could be the CPU, but check power and RAM first
Note: Many modern boards use a row of diagnostic LEDs (labelled CPU, DRAM, VGA, BOOT) instead of beeps. A CPU light that stays lit during boot points straight at the processor or its power delivery.
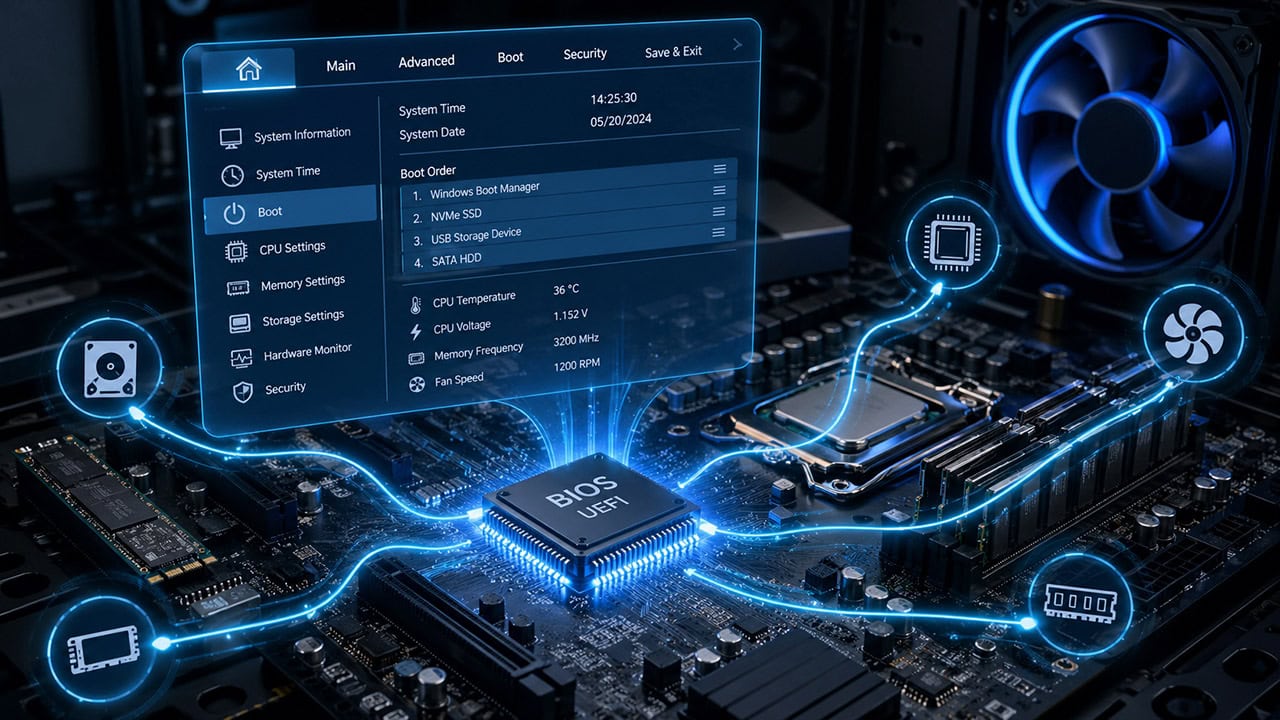
What to Check on the BIOS Screen
Enter the BIOS or UEFI by tapping Delete, F2, or Esc right after powering on (the correct key shows briefly on the startup screen). If you are new to this, our guide on what the BIOS does at startup explains the screens you will see. Once inside, confirm the basics:
- CPU model and speed: should match the chip you actually have
- Core and thread count: every core should be present, not just some
- Temperature: should sit under 122°F (50°C) when idle in the BIOS
- Warnings: look for "CPU Fan Error" or "CPU Over Temperature" messages
Warning signs during startup: the machine powers on but shows nothing, reaches the BIOS then freezes before Windows, restarts over and over in a boot loop, or reports the wrong CPU details or missing cores. Any of these is worth investigating before you trust the system.
3. Performance and Usage Checks in Windows
Once Windows is running, Task Manager is the fastest way to see whether the CPU is behaving. Press Ctrl + Shift + Esc, open the Performance tab, and click CPU.
What healthy CPU usage looks like
Normal behaviour:
- Idle: 1-5%, with occasional brief jumps to 10-15%
- Browsing or office work: 10-30%
- Gaming or video editing: 60-90%, spread across the cores
Warning signs:
- Over 20% at idle: usually a background app or malware, occasionally a struggling CPU
- One core pinned at 100%: a stuck process, or rarely a failing core
- Clock speed never reaching base: the CPU is being held back by heat or power
While you are in the CPU view, right-click the graph and choose "Change graph to / Logical processors" to see every core individually. Healthy multi-threaded work should light up all of them. Also watch the Up time figure: if it keeps resetting on its own, the machine is crashing or restarting without telling you, which is a strong clue that something is unstable.
Tip: High CPU usage on its own is not a fault. A CPU sitting at 100% while you render a video or play a demanding game is doing exactly its job. The concern is high usage when nothing should be running, or the CPU failing to reach its rated speed when it is needed.
A modern processor packs billions of transistors into a chip smaller than a postage stamp, and it is extremely rare for them all to give up together. What usually happens instead is that heat, voltage stress, or age weakens a small part of the chip. The CPU still powers on and handles light tasks, but it stumbles when pushed hard, so you see crashes in games or heavy software while web browsing feels fine. This is exactly why stress testing is so useful: it loads every part of the processor at once and surfaces the weak spots that everyday use would never reach. A chip that looks perfect in Task Manager can still fail a 30-minute stress test, and that test is what tells you the truth.
4. Check CPU Temperature
Overheating is by far the most common reason a CPU misbehaves, and the symptoms look identical to a "dying" chip: crashes, freezes, and a machine that feels slow. When a CPU gets too hot it deliberately slows itself down to protect itself, which is called thermal throttling. Confirming temperature early can save you from replacing a perfectly good processor.
Download a free monitoring tool such as Core Temp, HWMonitor, or HWiNFO, then watch the readings at idle and again while the machine is working hard.
| What you are doing | Safe | Getting hot | Too hot | What to do |
|---|---|---|---|---|
| Idle / light use | 86-113°F (30-45°C) | 115-131°F (46-55°C) | 133°F+ (56°C+) | Check the cooler is seated and the fan is spinning |
| Gaming | 122-167°F (50-75°C) | 169-185°F (76-85°C) | 187°F+ (86°C+) | Improve cooling or airflow |
| Heavy load / rendering | 140-176°F (60-80°C) | 178-194°F (81-90°C) | 196°F+ (91°C+) | Repaste, clean dust, check the cooler |
| Stress testing | 158-185°F (70-85°C) | 187-201°F (86-94°C) | 203°F+ (95°C+) | Stop the test and fix cooling |
The danger zone: most modern CPUs begin throttling around 194-212°F (90-100°C) and will shut the system off to avoid permanent damage at the top of that range. Brief spikes to 90°C under a stress test are not unusual, but a chip that sits there during normal use has a cooling problem, not a dead core. Clean the dust, reseat the cooler, and replace the thermal paste before spending money on a new processor.
5. Run a Stress Test
A stress test is the single most reliable way to confirm a CPU is stable. It loads every core to the maximum for a sustained period, which exposes the weak spots that normal use never reaches. Keep a temperature monitor open the whole time so you can stop if things get too hot.
Recommended CPU Testing Tools
| Tool | What it does | Best for | Cost |
|---|---|---|---|
| Prime95 | Heavy stress test | Finding hidden instability and errors | Free |
| Cinebench | Benchmark score | Comparing your CPU against the same model | Free |
| CPU-Z | Info + quick bench | Confirming specs and a fast sanity check | Free |
| OCCT | Stress + error detection | Catching errors with built-in monitoring | Free |
| Intel / AMD tools | Official diagnostics | A pass/fail check from the chip maker | Free |
How to run Prime95
- Download it: get Prime95 from the official Mersenne site and open it.
- Choose a test type: Small FFTs generates the most heat and stresses the cores hardest; Blend tests the CPU and memory together, which is better for finding mixed instability.
- Run for 30 minutes for a quick confidence check, or several hours overnight to be thorough.
- Watch temperatures and the worker windows. If a worker stops or reports an error, or the machine crashes, you have found real instability.
Reading the result: a healthy CPU runs the whole test with no errors, no crashes, steady clock speeds, and temperatures that stay under about 185°F (85°C). Errors, a worker that quietly stops, blue screens, or clock speeds collapsing partway through all point to a real problem. If you have an Intel 12th-gen or newer chip with both performance and efficiency cores, make sure the test is loading both core types, not just one.
If a stress test passes cleanly but you still crash only in games, the CPU is probably fine and the issue lies elsewhere, often the graphics card. It is worth confirming the GPU separately using our companion guide on how to check if a GPU is working properly.
6. Check the Windows Error Logs
Windows quietly records hardware faults, and the logs often name the culprit before you have run a single test. Press Windows + X and open Event Viewer, then expand Windows Logs and select System. Look for red error entries around the times your machine crashed.
Errors worth noting
- WHEA-Logger errors: reported hardware faults, frequently the CPU or motherboard. These are the strongest software-level sign of a processor problem.
- Unexpected shutdown (Kernel-Power 41): the system lost power or hard-locked without a clean shutdown.
- MACHINE_CHECK_EXCEPTION: a blue-screen code that often accompanies CPU or power instability.
Before you blame the CPU: WHEA and machine-check errors can also come from unstable memory, a tired power supply, or an aggressive overclock. Reset the BIOS to its defaults and test your RAM first, since faulty memory produces symptoms that look almost exactly like a failing processor.
7. Physical Inspection
Safety first: shut the computer down fully and unplug it from the wall before opening the case. Touch a bare metal part of the chassis to discharge static before you handle anything inside.
Most of the time you will never need to remove the processor, but a physical look helps when the software checks are inconclusive. Take the cooler off and inspect the area carefully. On AMD AM4 chips the pins are on the processor itself, so check for any that are bent. On Intel boards and AMD AM5, the pins are in the socket, so inspect those instead. For background on why the two are built differently, see our breakdown of the CPU socket on the motherboard. Look for discoloration, burn marks, or a burnt smell, any of which point to real damage.
While the cooler is off, this is the ideal moment to clean away the old, dried thermal paste and apply a fresh pea-sized amount before refitting the cooler. Hardened paste is one of the most common reasons an older CPU starts overheating, and it is a cheap fix. Make sure the cooler clips down evenly and the fan header is plugged in before you close the case.
8. Common Problems and Solutions
Computer Powers On but Shows Nothing
Symptoms: fans spin and lights come on, but there is no display, no BIOS, and no beeps.
This is rarely the CPU on its own. Reseat the RAM one stick at a time, confirm the 8-pin CPU power connector at the top of the board is fully clicked in, and check the motherboard's diagnostic LEDs or beep codes. If the board has a lit CPU light and you have already ruled out power and memory, only then does the processor become the likely cause. If your CPU has integrated graphics, plug the monitor into the motherboard's video output to rule out the graphics card.
Random Crashes, Freezes, and Restarts
Symptoms: the machine works, then locks up, blue-screens, or reboots on its own with no clear pattern.
Work through it in order: check Event Viewer for WHEA errors, test the RAM with Windows Memory Diagnostic (press Windows + R, type mdsched.exe), reset the BIOS to defaults to undo any unstable overclock, and try Safe Mode. If the system is rock solid in Safe Mode, the fault is almost certainly a driver or software, not the CPU. If it still crashes, run Prime95 overnight; genuine CPU instability will usually surface within a few hours.
Everything Feels Slow
A sluggish machine is far more often a heat, storage, or software issue than a worn-out processor. Confirm the CPU is reaching its rated clock speed under load in Task Manager, check temperatures for throttling, and rule out a failing drive or background malware. Our guide on why computers slow down with age covers the usual culprits. If the CPU genuinely cannot keep up with newer software even when healthy, the issue may simply be that it is paired with a much stronger graphics card; our CPU bottleneck calculator can show whether that mismatch is holding you back.
Crashes Only in Games
If the CPU passes a stress test but games still crash, the processor is probably fine. Confirm CPU temperatures during play, then turn your attention to the graphics card and its drivers. Heat that only appears under a gaming load, rather than a stress test, usually means a cooling or power-delivery limit rather than a dead core.
Repair or Replace?
Worth saving when: the chip is under warranty, the trouble is clearly heat-related and fixed by a clean and a fresh repaste, or the symptoms turn out to be RAM, power, or software rather than the CPU itself.
Time to replace when: multiple stress tests confirm errors at stock settings with good temperatures, you see repeated WHEA hardware faults that survive a BIOS reset and a RAM swap, or there is visible physical damage to the chip or socket. Because the processor is rarely the cheapest or easiest part to swap, confirm it is truly at fault before buying a new one. If you are sizing up a replacement, our system requirements checker helps you match a CPU to what you actually run, and a second-hand system is often the cheaper fix as long as you check it over properly first.
Related Posts
How to Know If Your CPU Is Thermal Throttling
Spot the signs of a CPU slowed by heat, confirm it with HWiNFO64, and learn the Intel and AMD limits that trigger it.
How to Check If a GPU Is Working Properly
The companion guide for graphics cards: monitoring tools, benchmarking, physical inspection, and common GPU faults with fixes.
Understanding the BIOS and Its Main Functions
What POST does, the BIOS Setup Utility, CMOS, Secure Boot, overclocking, and Legacy BIOS vs UEFI explained.

Why Do Computers Slow Down With Age?
The real causes of an aging PC slowing down, and the fixes that bring it back without a new computer.