How to Clean RAM Contacts
By Marlo Strydom · Last updated
I tested various methods when I first started to work on computers many years back. If you want to know how to clean RAM contacts to achieve the lowest number of memory errors, this is what I have found to work the best.
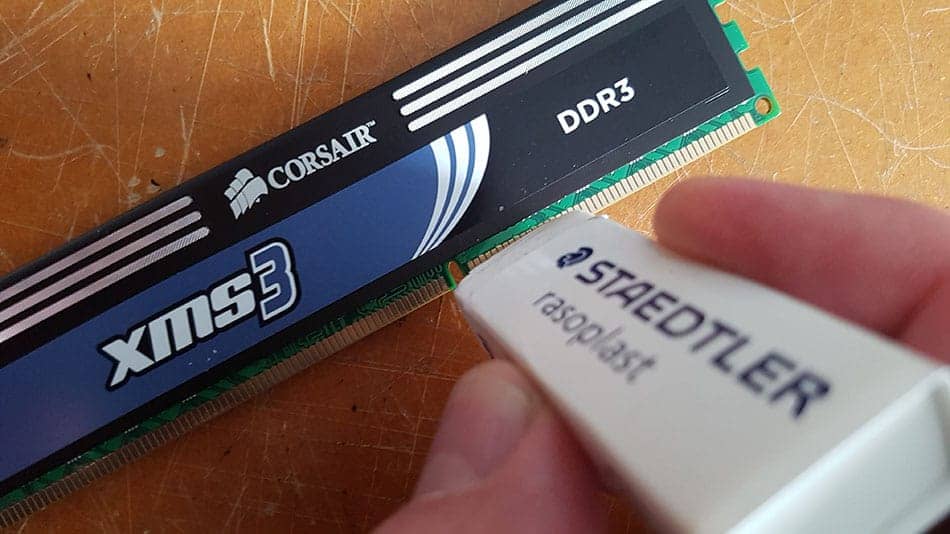
To clean RAM contacts: power down and remove the stick, rub the gold pins gently with a clean pencil eraser until they brighten, wipe off the residue with a lint-free cloth, blow the pins and the empty slot dry with compressed air, then reseat the stick until both clips lock. The whole job takes about ten minutes.
The only catch is to have the right kind of eraser, lint-free cloth, and compressed air. And, of course, to take extra time to make sure no eraser residue or filings are left behind.
Take your time with it. The procedure itself is straightforward, but the details matter, no eraser bits left in the slot, no fingers on the gold pins, no dust dropped onto the stick. Work cleanly and you'll get a good result.
The same steps work on graphics cards, PCIe cards, and M.2 SSDs. Any part with gold edge pins can be cleaned this way.
What You'll Need
- Phillips screwdriver: to open the computer case.
- Clean white pencil eraser: use a soft, good-quality white rubber eraser. Avoid hard or cheap erasers and any one already covered in pencil marks, since those can scratch the pins or leave residue.
- Lint-free or microfiber cloth: to wipe off the residue.
- Can of compressed air: to blow the pins and slots clean.
- Anti-static wrist strap: recommended, to protect the parts from static.
How to Clean RAM Contacts Step by Step
Step 1: Power Down and Open the Case
Turn off the computer and unplug it. Take out all the cables. Touch the metal frame of the case to drain static from your body, or wear an anti-static wrist strap. Take off the side panel. If the inside is dusty, clean that out first so you do not drop dust onto the RAM later.
Step 2: Take Out the RAM
Find the RAM slots. They are long, thin slots on the motherboard, usually next to the CPU. Push down the clip at each end of the slot, and the stick will pop up a little. Hold the stick by its edges and lift it straight up. Do not touch the gold pins with your fingers.
Step 3: Rub the Contacts With an Eraser
Lay the stick on a clean, dry surface. Rub the gold pins with the eraser using short, gentle strokes until they look brighter. Turn the stick over and clean the pins on the other side the same way.
Step 4: Clear Off the Residue
Wipe the pins with the lint-free cloth to remove the eraser bits. Tap the stick lightly on the table, then blow the pins with compressed air to clear anything left behind.
Step 5: Clean the Slots
Blow compressed air into the empty RAM slots on the motherboard, since dust and debris collects in there too. Shine a flashlight into the slots to check that they are clear.
Step 6: Put the RAM Back
Line up the notch. The gap in the pins only fits the slot one way. Press the stick straight down until the clips snap shut on both ends. Check that both clips are locked and the stick sits level.
An optional step is to lightly rock the RAM module in its slot once it's in place so the contacts stabilize a little better. This is a principle called contact wipe. You could simply pull the RAM out and reseat it a few times, but my concern with that is, you may introduce some new debris into the slot that way.
If you run manual DRAM voltages in BIOS, retest your stability after cleaning before assuming your old voltage is still right. Clean contacts mean less resistance across the joint, which often lets the system run stable at slightly lower voltage than dirty ones needed. Worth dropping it a step at a time and retesting.
Mistakes to Avoid
- Do not touch the gold pins with your fingers. Skin oil leaves a film that causes the same connection problems as dirt.
- Do not use sandpaper, steel wool, or a rough cloth. They scratch off the thin gold layer. Only a soft eraser is safe.
- Do not leave eraser bits behind. This is the single most common reason I've had to redo cleaning work that other technicians did. Fragments collect in the slot fingers and block the connection just like the original dirt did. Before reseating the stick, shine a flashlight into the slot and check that it's clear, then blow it again with compressed air to be sure.
If You Find Fragments in the Slot After Reseating
Once the stick is snapped back in with eraser filings still in the slot, those fragments get pressed against the slot fingers and become harder to remove. If that's happened, take the RAM back out, then work a small soft brush along the inside of the slot to nudge the filings loose. Follow with a strong burst of compressed air to clear them out, and inspect with a flashlight before reseating the stick a second time.
Why Dirty RAM Contacts Cause Problems
RAM sticks have a row of gold pins along the bottom edge. These pins press into the slots on your motherboard and carry data between the memory and the rest of the computer.
Over time, a thin layer of oxidation and dust builds up on these pins. Oxidation is a film that forms on metal and makes it harder for electricity to pass through. When the pins are dirty, the connection gets weak. The computer may freeze, crash with a blue screen error, or fail to start at all.
The pins are gold-plated because gold does not rust or corrode. But the gold layer is very thin, only a few microns. That is why you must be gentle and never scrape the pins with anything rough.
When to Clean Your RAM
You do not need to clean RAM contacts often. Most people only do it when something goes wrong. Clean your RAM if you notice any of these signs:
- The computer will not start or shows a blank screen.
- Random crashes or blue screen errors.
- Memory errors in the Windows event log.
- Beeping when you turn the computer on, which often points to a RAM problem.
- You just bought used RAM and want to be sure the pins are clean.
If cleaning does not fix the problem, the RAM itself may be bad. Test it with the built-in Windows Memory Diagnostic or the free MemTest86 program. If the memory passes but the computer still feels slow, you may just need more memory.
Our RAM configuration tool shows whether an upgrade would help.
To keep the pins clean longer, keep dust out of your computer with intake filters and regular cleaning.
Related Posts
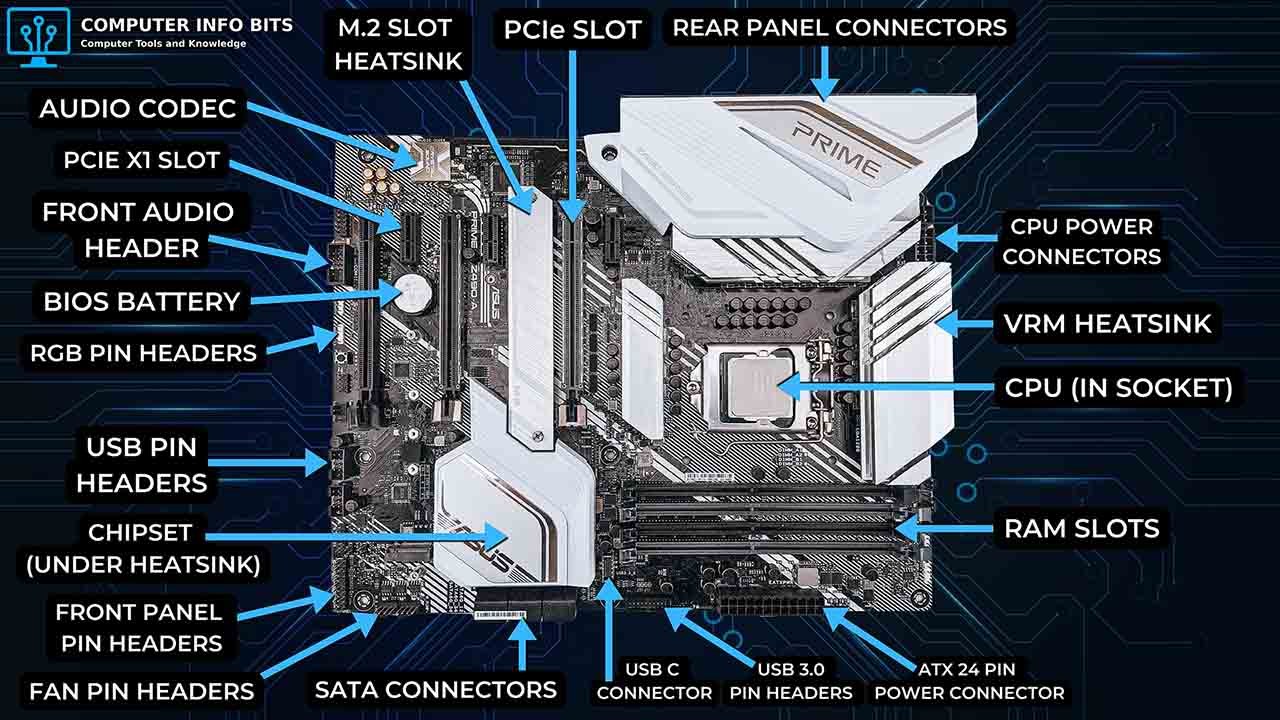
Parts of a Motherboard and Their Functions
CPU socket, chipset, RAM slots, PCIe slots, BIOS chip, and rear I/O panel explained.
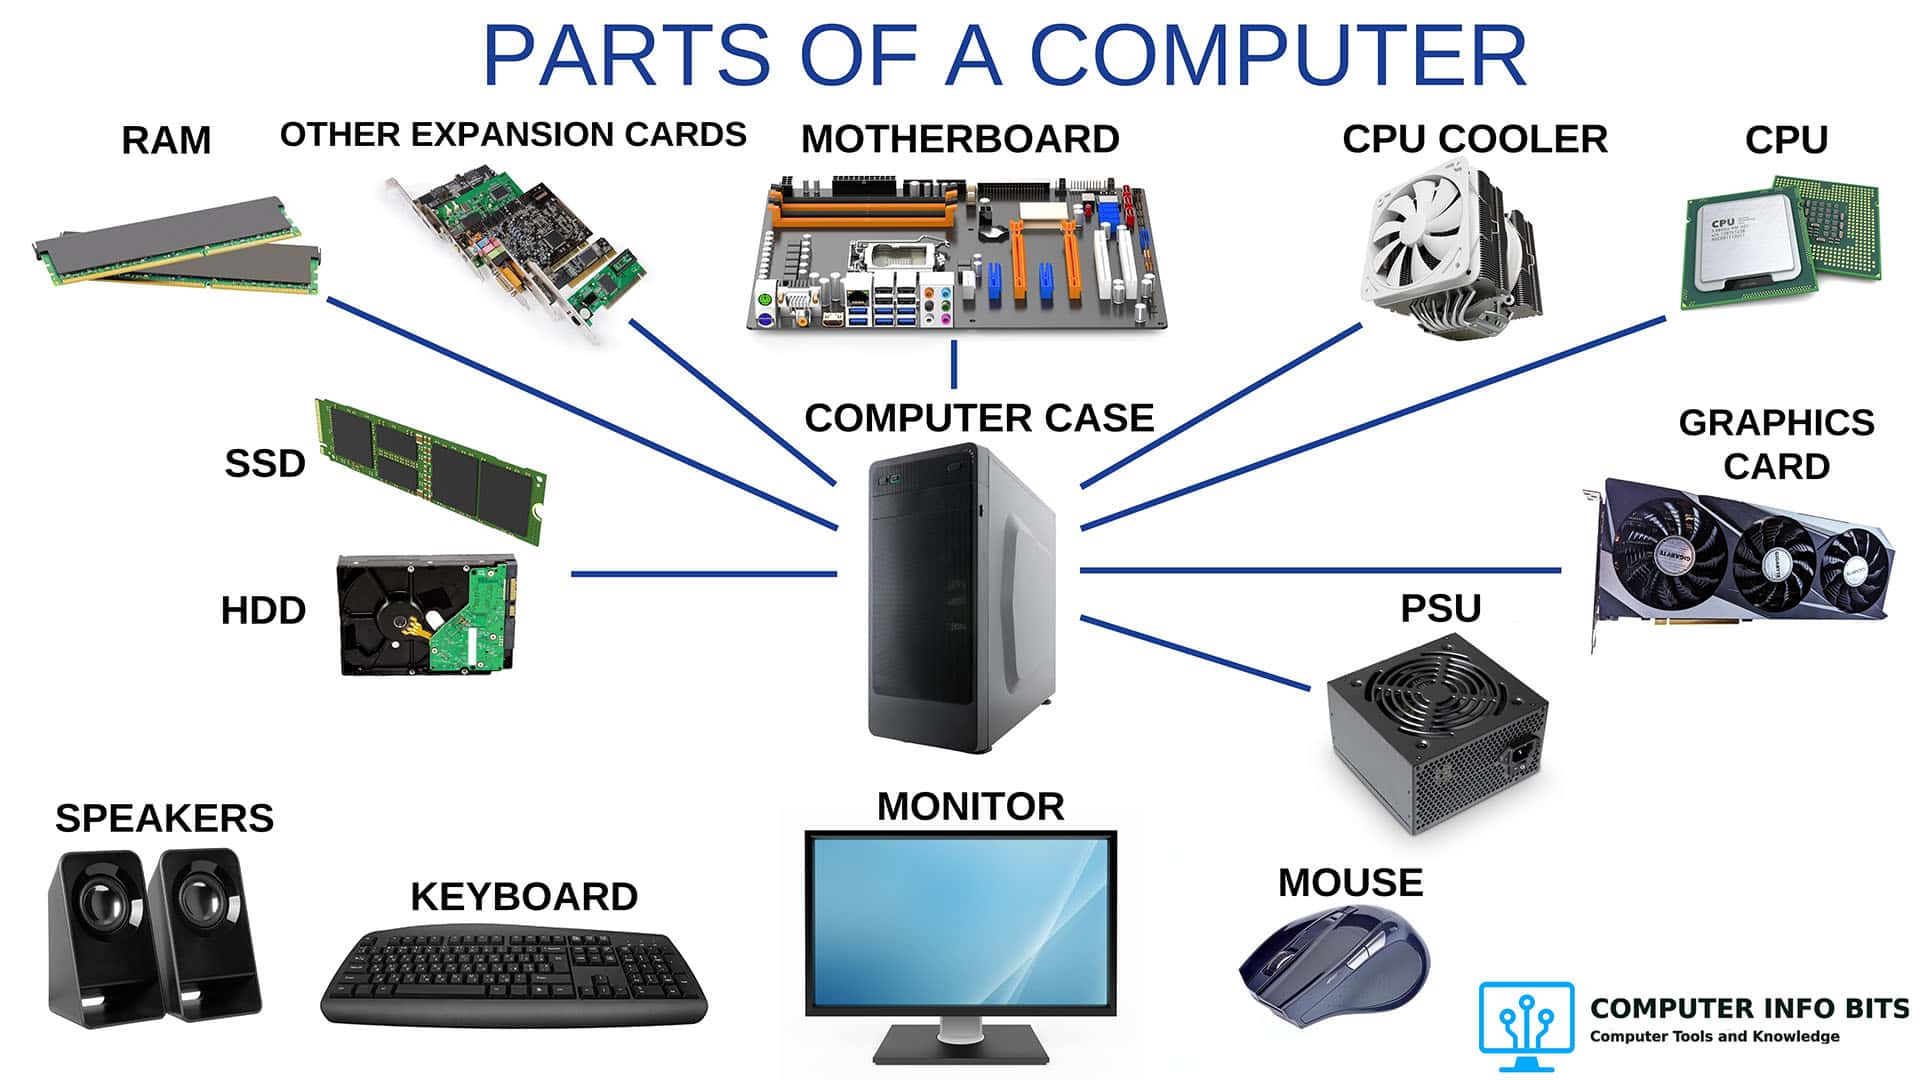
Parts of a Computer and Their Functions
A complete breakdown of every major PC component including RAM, the CPU, and storage.
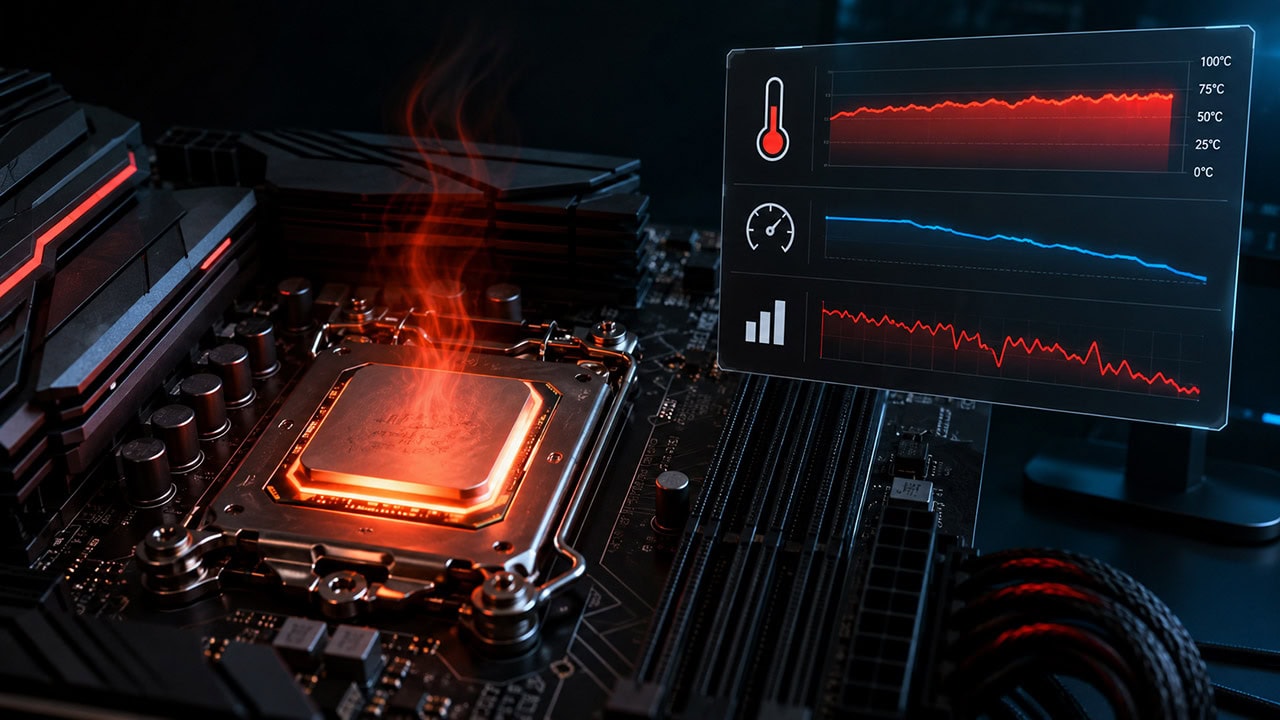
How to Know If Your CPU Is Thermal Throttling
Spot the signs of a CPU slowed by heat, confirm it with HWiNFO64, and learn the Intel and AMD limits that trigger it.

PC Airflow Optimization: How to Cool Your Computer
Set up your case fans correctly to keep temperatures low and reduce the dust that fouls contacts.